Install Wordpress on AWS (for free)
Posted 29 June 2017 in Development
Whilst I'm gradually building out my own blogging platform to meet my specific needs, I still regularly have to spin up and maintain WordPress installations (both at my previous role at iSeekplant and at my new gig at Databee). As more and more businesses move to 'the cloud', it's becoming increasingly typical to host blogs on infrastructures such as Amazon Web Services and DigitalOcean. DigitalOcean have more or less got you covered with one-click installers to spin up new server instances with everything ready to go, and AWSs slightly more consumer-friendly Amazon Lightsail has similar offerings at a comparable price-point. However if you're prepared to get your hands a little greasy and bypass the Lightsail interface you can take advantage of AWSs free usage tier.
Whilst there are plenty of AMIs available on the AWS Marketplace to do this for you, I prefer a slightly more hand-on approach - plus, it really isn't that complicated. Using AWSs free-usage tier, you can quickly get up and running with a custom WordPress blog on your own hosting, for free (well, for the first year at least).
Launch a server
I'll assume that you've gone through the AWS registration (you will need a credit card - though it won't be charged) and verification process and are ready to go.
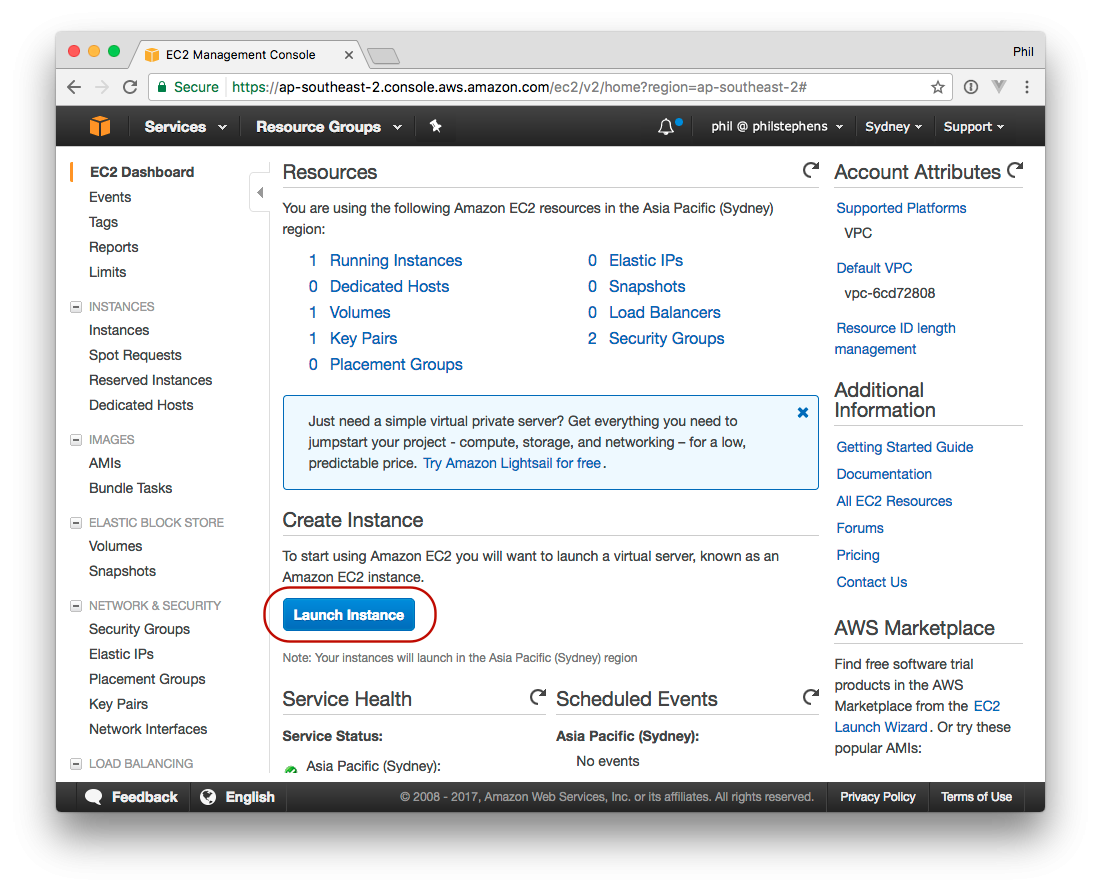
Log into your AWS account and go to the EC2 dashboard.
Click Launch Instance.
Select the Amazon Linux AMI 2017.03.1 (HVM), SSD Volume Type (version correct at time of writing).
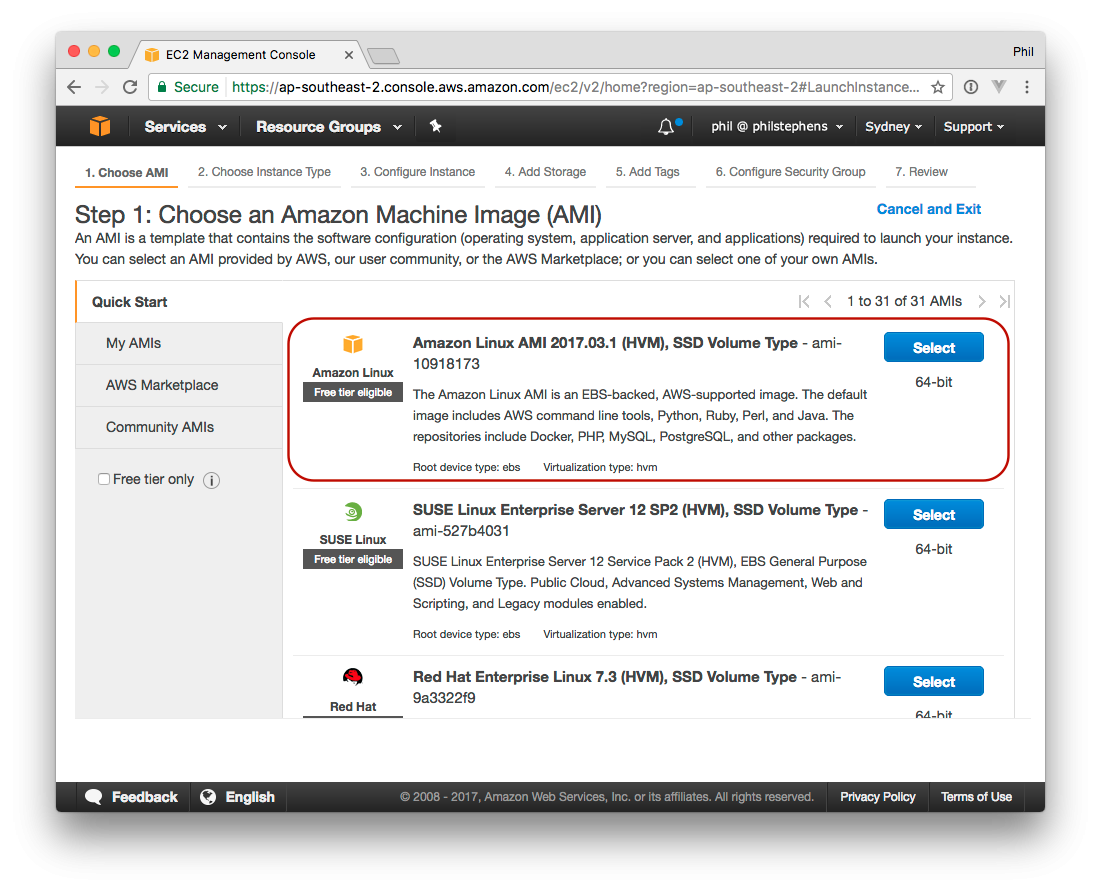
For the purposes of this tutorial, the default selection (t2.micro) is fine (and eligible for the free usage tier!)

Skip both the Step 3 (Configure Instance Details) and Step 4 (Add Storage) - they have sensible defaults.
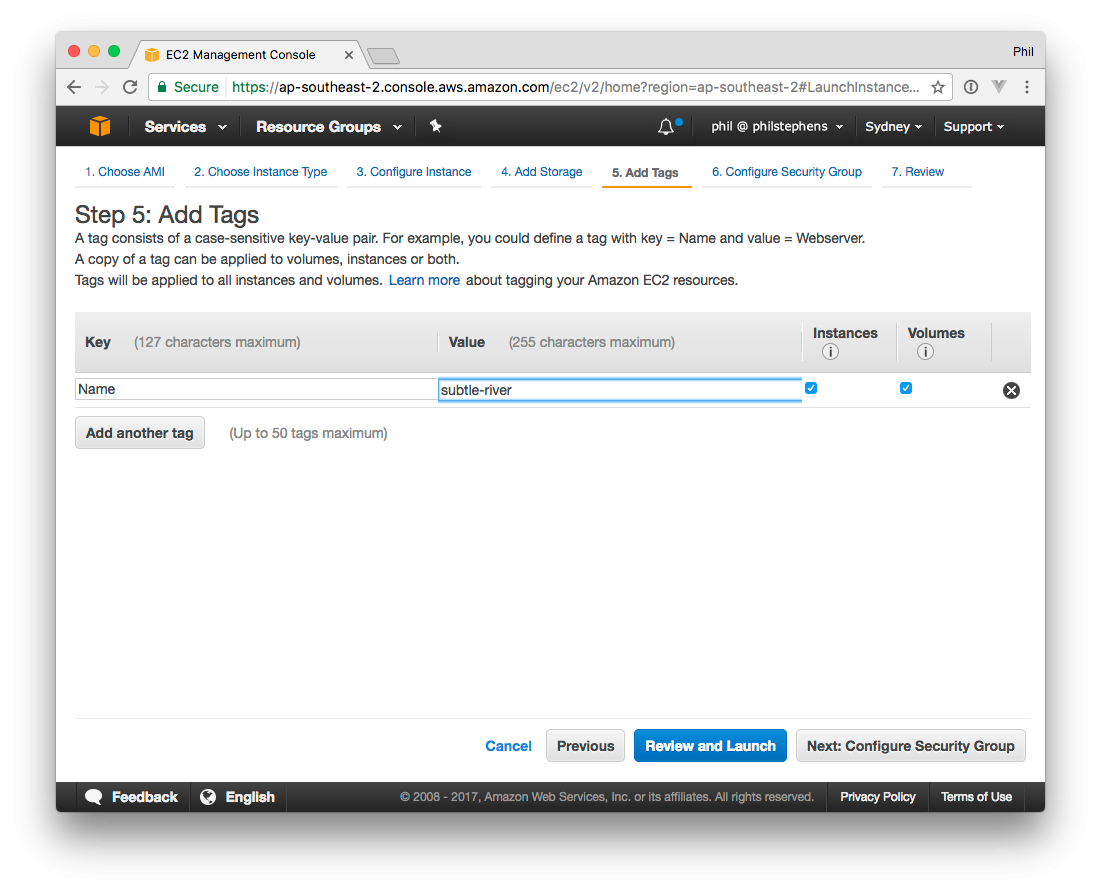
In Step 5 (Add Tags) give your instance a name by clicking click to add a Name tag. Can't think of a name? Check out some fun suggestions at https://haikunator.cloudstage.me/.
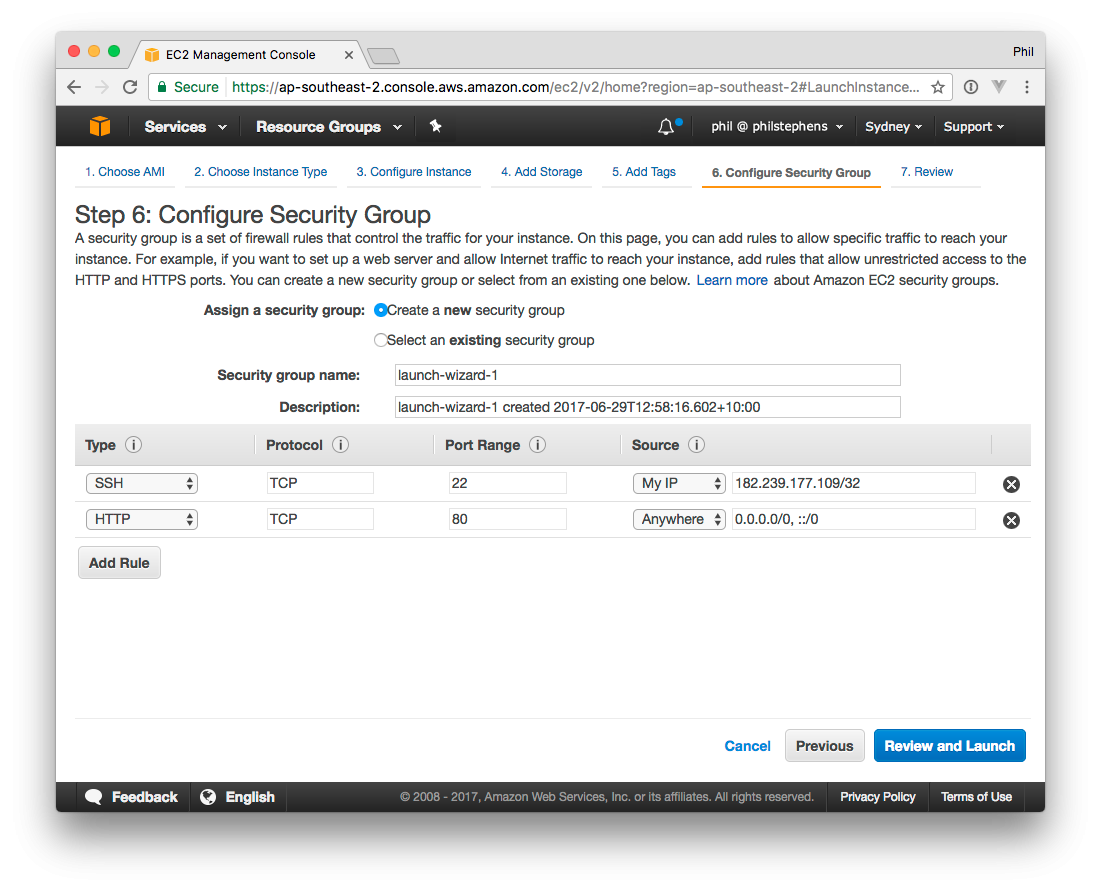
Next up, configure the security group. For this tutorial we'll set up some very basic rules. First off, lock down SSH access to your current IP address. Then add a rule for HTTP on port 80 - set this to Anywhere.
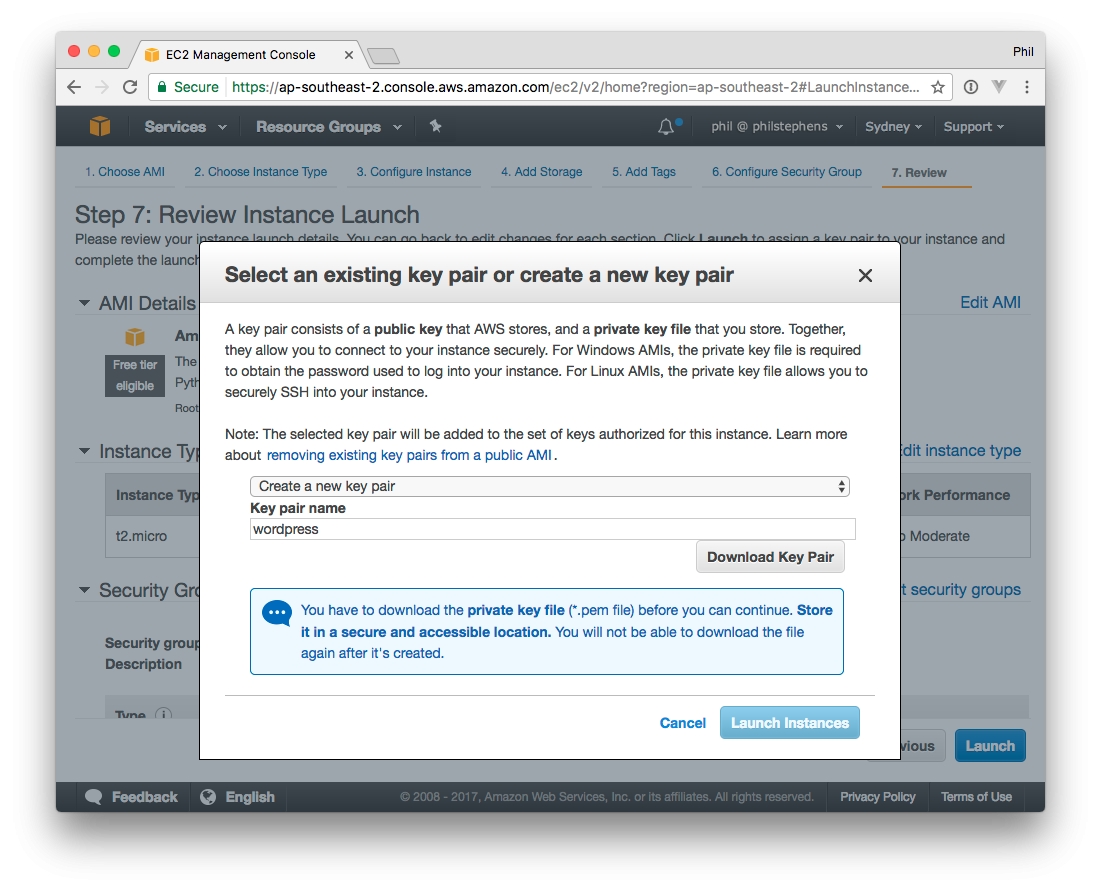
Click Review and Launch. This is the final step before we launch the new server instance - setting up an access key for SSH access to the server. When prompted, select Create a new key pair and give it a memorable name. Download the key file (in .pem format) and keep it safe - this will be your only means to access the new server.
Finally, click Launch Instance to spin up your new server.
If you return to the instance overview you will be able to see your new EC2 instance initialising. Make a note of the IPv4 Public IP address - you will need it next for logging onto the server.
In the first instance, to access the server (and your new WordPress installation) in a browser, you can either use the Public DNS URL (something like ec2-52-63-199-239.ap-southeast-2.compute.amazonaws.com) or use a service such as CloudStage to quickly create a more memorable staging domain - just enter your instance's IP address.
Connect to your server instance
From now on we'll be using the command line to connect to and update your server. Once your server is up and running open up Terminal (or similar) and navigate to where you have stored your pem file. You'll need to update the file permissions before you can use it to ssh into your server:
chmod 400 wordpress.pem
Now you should be able to log into your box (substitute your server's IP address):
ssh -i wordpress.pem [email protected]
Install Apache, PHP and MySQL
sudo yum update -y
sudo yum install -y httpd24 php56 mysql55-server php56-mysqlnd
sudo service httpd start
Navigate to your staging domain (or your server's public DNS) and you should see the default Apache page.
Since we don't want to have to manually start Apache in the event of a server reboot, you can use the chkconfig command to configure the Apache web server to start at each system boot.
sudo chkconfig httpd on
The chkconfig command does not provide any confirmation message when you successfully use it to enable a service. You can verify that httpd is on by running the following command:
chkconfig --list httpd
httpd           0:off   1:off   2:on    3:on    4:on    5:on    6:off
Here, httpd is on in runlevels 2, 3, 4, and 5 (which is what you want to see).
We won't bother setting up any virtual hosts in this tutorial, so everything for our site will go straight into the default directory /var/www/html/.
Set the file permissions:
sudo groupadd www
sudo usermod -a -G www ec2-user
exit
Log back in to your server (you can press the up arrow in your terminal to bring up the correct command).
Next we want to update the file permissions on the website root directory:
sudo chown -R root:www /var/www
sudo chmod 2775 /var/www
find /var/www -type d -exec sudo chmod 2775 {} \;
find /var/www -type f -exec sudo chmod 0664 {} \;
Setting up MySQL
sudo service mysqld start
sudo mysql_secure_installation
- Press enter for the current root password
- Set a new root password
- Remove anonymous users - Yes
- Disallow root login remotely - Yes
- Remove test database and access to it? - Yes
- Reload privilege tables now - Yes
In order to complete your WordPress installation you'll need to set up a database, so let's do that now.
mysql -u root -p
Enter the root password that you set in the previous step.
CREATE DATABASE wordpress;
quit;
Finally, as we did with Apache, lets set MySQL to start automatically on system boot:
sudo chkconfig mysqld on
Install WordPress
cd /var/www/html/
sudo wget https://wordpress.org/latest.zip
sudo unzip latest.zip
sudo mv wordpress/* ./
sudo rm latest.zip
sudo rmdir wordpress
Now you can visit your staging domain (or public DNS) and complete the installation.
You may get an alert Sorry, but I can't write the wp-config.php file - if so run the following:
cd /var/www
sudo chown -R apache /var/www/html
cd html/
sudo find . -type d -exec chmod 0755 {} \;
sudo find . -type f -exec chmod 0644 {} \;
sudo service httpd restart
Refresh the browser and run the setup again - you should now be all set.
Fix permalinks
In order for WordPress' pretty URL structure to work, you need to make some minor adjustments to your Apache setup:
sudo nano /etc/httpd/conf/httpd.conf
Find all instances of Allowoverride None and replace with Allowoverride All. Save and exit, and then restart Apache for the changes to take effect:
sudo service httpd restart
You will now have a fully functioning installation of WordPress running on AWS!
Email a comment