Creating a Microblog publishing app with Workflow
Posted 17 July 2017
My homegrown micro-blogging platform is designed to work well on mobile, but I wanted a quick way to post in a more native way from my iPhone. Enter Workflow, a powerful way to create custom actions on your iOS devices.
I'll admit that I'm a little late to the show with Workflow, but it really is powerful little tool (evident in the fact that Apple actually bought it!).
Setting up the server
For speed, we're going to want our workflow to be able to post directly to our Laravel-based microblog without needing to go through the standard authentication flow. For ease we'll leverage Passport, Laravel's Oauth package, to handle all of the authentication heavy-lifting.
I won't go through the complete functionality of Passport - just enough to get everything up and running (you can refer to the documentation for more detail).
Installing Passport
To get started, install Passport via the Composer package manager:
composer require laravel/passport
Next, register the Passport service provider in the providers array of your config/app.php configuration file:
Laravel\Passport\PassportServiceProvider::class,
The Passport service provider registers its own database migration directory with the framework, so you should migrate your database after registering the provider. The Passport migrations will create the tables your application needs to store clients and access tokens:
php artisan migrate
Next, you should run the passport:install command. This command will create the encryption keys needed to generate secure access tokens. In addition, the command will create "personal access" and "password grant" clients which will be used to generate access tokens:
php artisan passport:install
When deploying Passport to your production servers for the first time, you will likely need to run the passport:keys command. This command generates the encryption keys Passport needs in order to generate access token. The generated keys are not typically kept in source control:
php artisan passport:keys
After running this command, add the Laravel\Passport\HasApiTokens trait to your App\User model. This trait will provide a few helper methods to your model which allow you to inspect the authenticated user's token and scopes:
<?php

namespace App;

use Laravel\Passport\HasApiTokens;
use Illuminate\Notifications\Notifiable;
use Illuminate\Foundation\Auth\User as Authenticatable;

class User extends Authenticatable
{
    use HasApiTokens, Notifiable;
}
Assuming that you have created a user in your database, you can now issue it a personal access token - whilst Passport has a full UI-based way of doing this, for now we'll use Tinker to issue it from the command line:
php artisan tinker
...
>>> $user = App\User::find(1);

>>> $user->createToken('Workflow')->accessToken
=> "eyJ0eXAiOiJKV1QiLCJhbGciOiJSUzI1NiIsImp0aSI6Im..."
Take a copy of the access token generated - we'll need it in a moment.
Creating the Post model
Now that we have bootstrapped the Passport OAuth2 server we can go ahead and bootstrap the rest of the server-side application.
First we will need a model to store our post information. For the sake of this guide we can keep it super simple, with posts having just a body field, as well as belonging to a registered user.
php artisan make:model Post -m
Add the necessary fields to the new migration that was just created:
<?php

use Illuminate\Support\Facades\Schema;
use Illuminate\Database\Schema\Blueprint;
use Illuminate\Database\Migrations\Migration;

class CreatePostsTable extends Migration
{
    /**
     * Run the migrations.
     *
     * @return void
     */
    public function up()
    {
        Schema::create('posts', function (Blueprint $table) {
            $table->increments('id');
            $table->unsignedInteger('user_id')->index();
            $table->text('body')->nullable()->default(null);
            $table->timestamps();
        });
    }

    /**
     * Reverse the migrations.
     *
     * @return void
     */
    public function down()
    {
        Schema::dropIfExists('posts');
    }
}
After running the migration we can add a couple fillable attributes to the model itself:
<?php

namespace App;

use Illuminate\Database\Eloquent\Model;

class Post extends Model
{
    protected $fillable = ['user_id', 'body'];
}
Setting up an endpoint
Finally we need to create the endpoint and controller that we can call from within our Workflow.
Add the following route to routes/api.php:
Route::middleware('auth:api')->post('post', 'Api\PostController@store');
Next, create that controller using the built-in Artisan command:
php artisan make:controller Api/PostController
At this stage the controller is going to be super-simple with just one method:
<?php

namespace App\Http\Controllers\Api;

use App\Post;
use Illuminate\Http\Request;
use App\Http\Controllers\Controller;

class PostController extends Controller
{
   public function store()
	{
    	$post = Post::create([
    		'user_id'	=> auth()->id(),
      		'body'		=> request('body')
		]);

		return;
	}
}
Setting up the Workflow
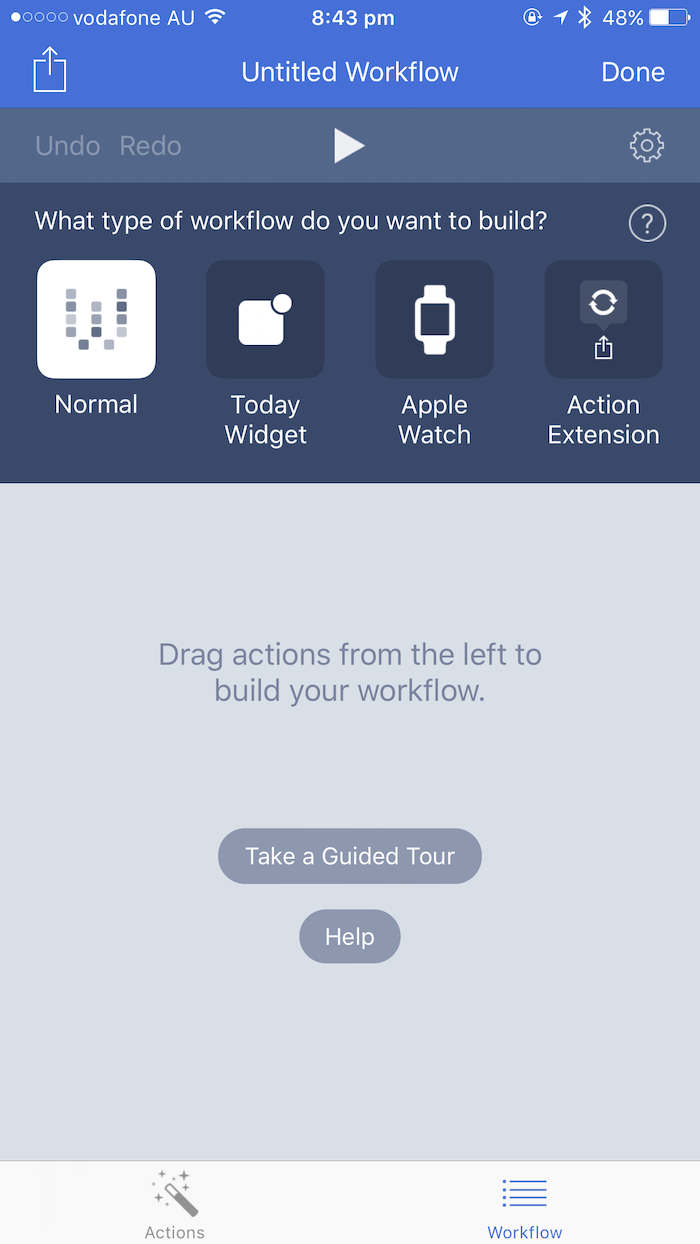
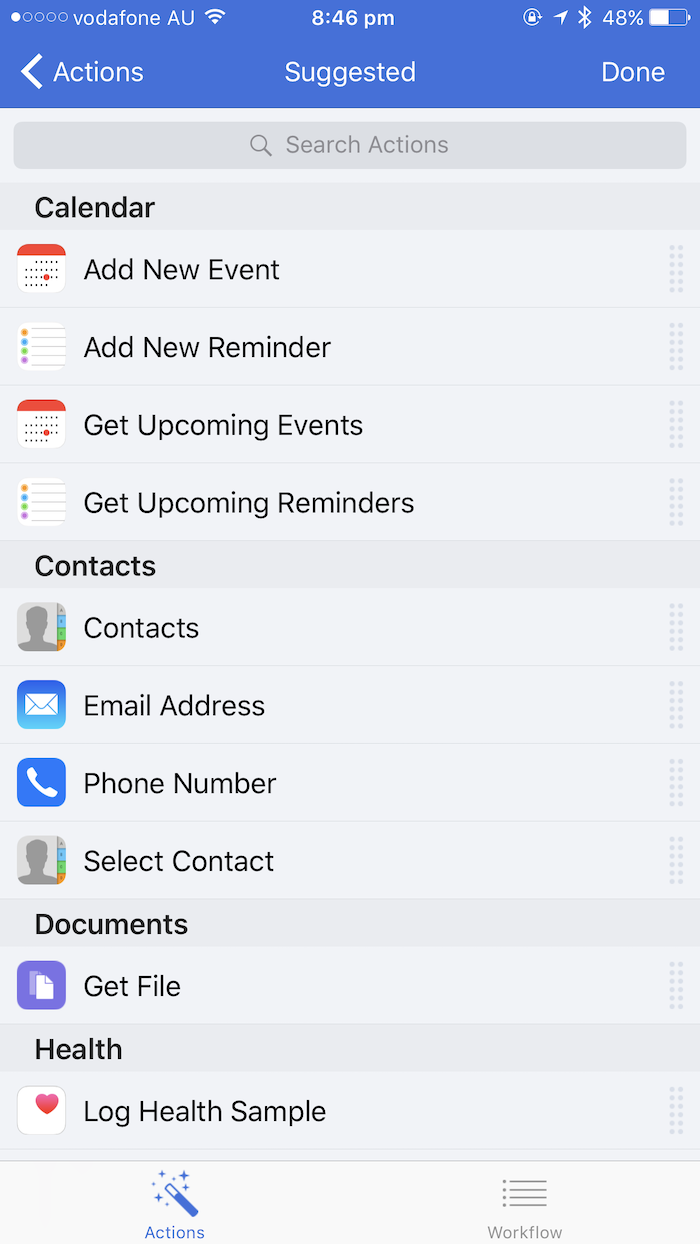
Now we can jump into Workflow and wire everything up. For this project we are going to use the following actions: Text, URL and Get Contents of URL. You can find all of the available actions by swiping right on the workflow, and then using the search bar at the top.
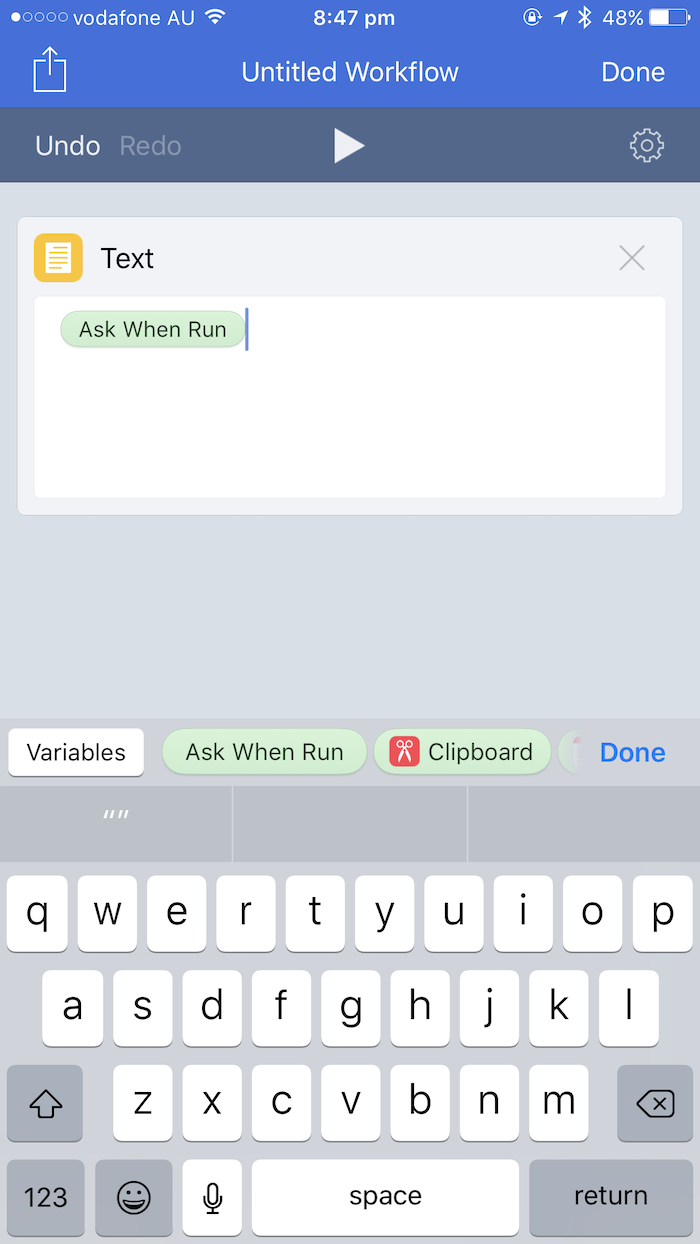
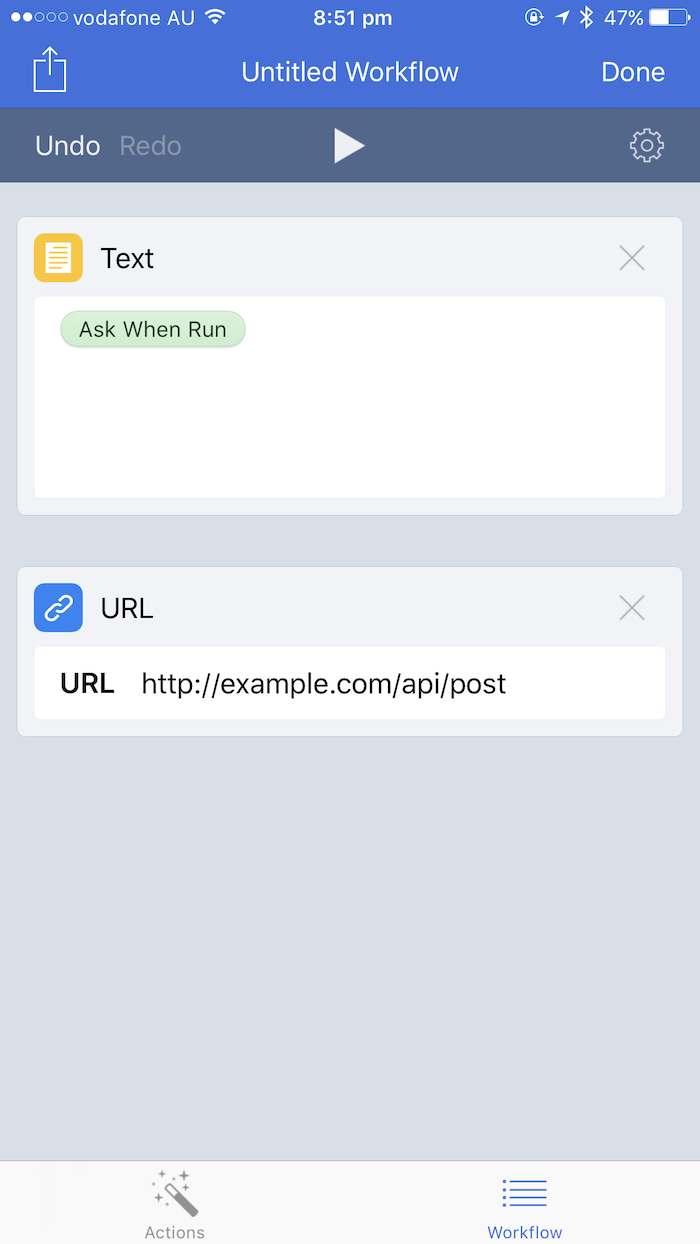
Start by dragging a Text action into the Workflow. Press on the text area and then select Ask When Run from the variables list.
Next add a URL action and enter the full URL to the endpoint that we created earlier. If you are developing locally you can use something like ngrok, which is bundled with Laravel Valet and Homestead, to make your local machine visible to the internet.
Finally we can add a Get Contents of URL to connect everything up. Hit the Advanced button and change the method to POST.
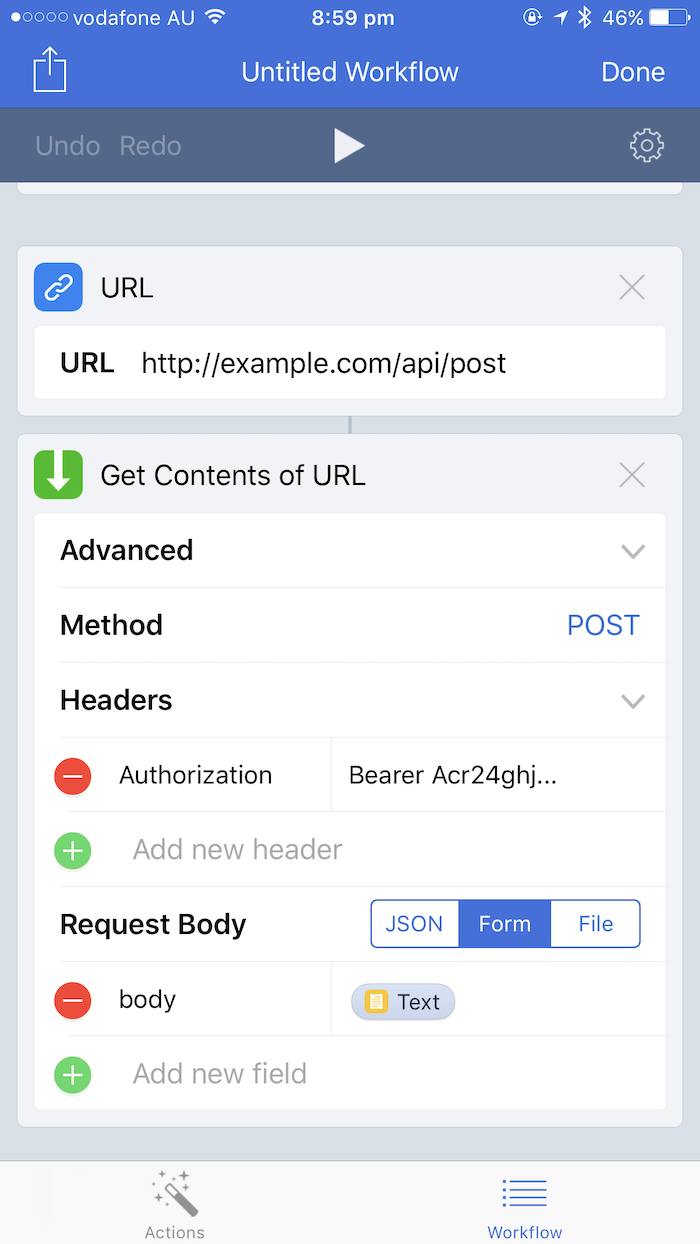
Next, add a header with the key Authorization and the value Bearer and the access key that we copied from Passport earlier.
Switch the Request Body to Form and add a field with the key body (type should be Text). For the value, select the Text variable from the list.
Running your new Workflow
Now that all of this is set up, it's as simple as hitting the play button in the menu bar.
A blank text area will pop up - when you enter some text and hit done, the rest of the Workflow will spring into action and make a post request to your server using the OAuth2 token, where it will be saved to your database (and displayed however you see fit online).
You can change the name of your Workflow by hitting the settings 'cog' - from here you can also add it directly to your homescreen like any other app, which is exactly what I have done.
Extending your Workflow
This simple set up is extremely useful, and extremely extensible. My microblog supports image uploads (think Instagram) so it was simply a matter of adding an image selector (Select Photos) to the start of the workflow, and then appending an additional field to the request body to hold the image. Then it was just a matter of adding some image-handling logic to the API endpoint and hey presto, a crude homegrown Instagram app!